You want a haunt that feels considered and lived-in, quiet tones, layered textures, and a few vintage or thrifted finds, rather than plastic and noisy. This guide shows you how to make Halloween decorations that look elevated with budget supplies and a clear plan. We’ll build eerie centerpieces, creepy wall hangs, and glowing pumpkins that hold up under porch wind and party hands, using muted neutrals, brushed metallics, and soft LED glow for a modern 2026 palette.
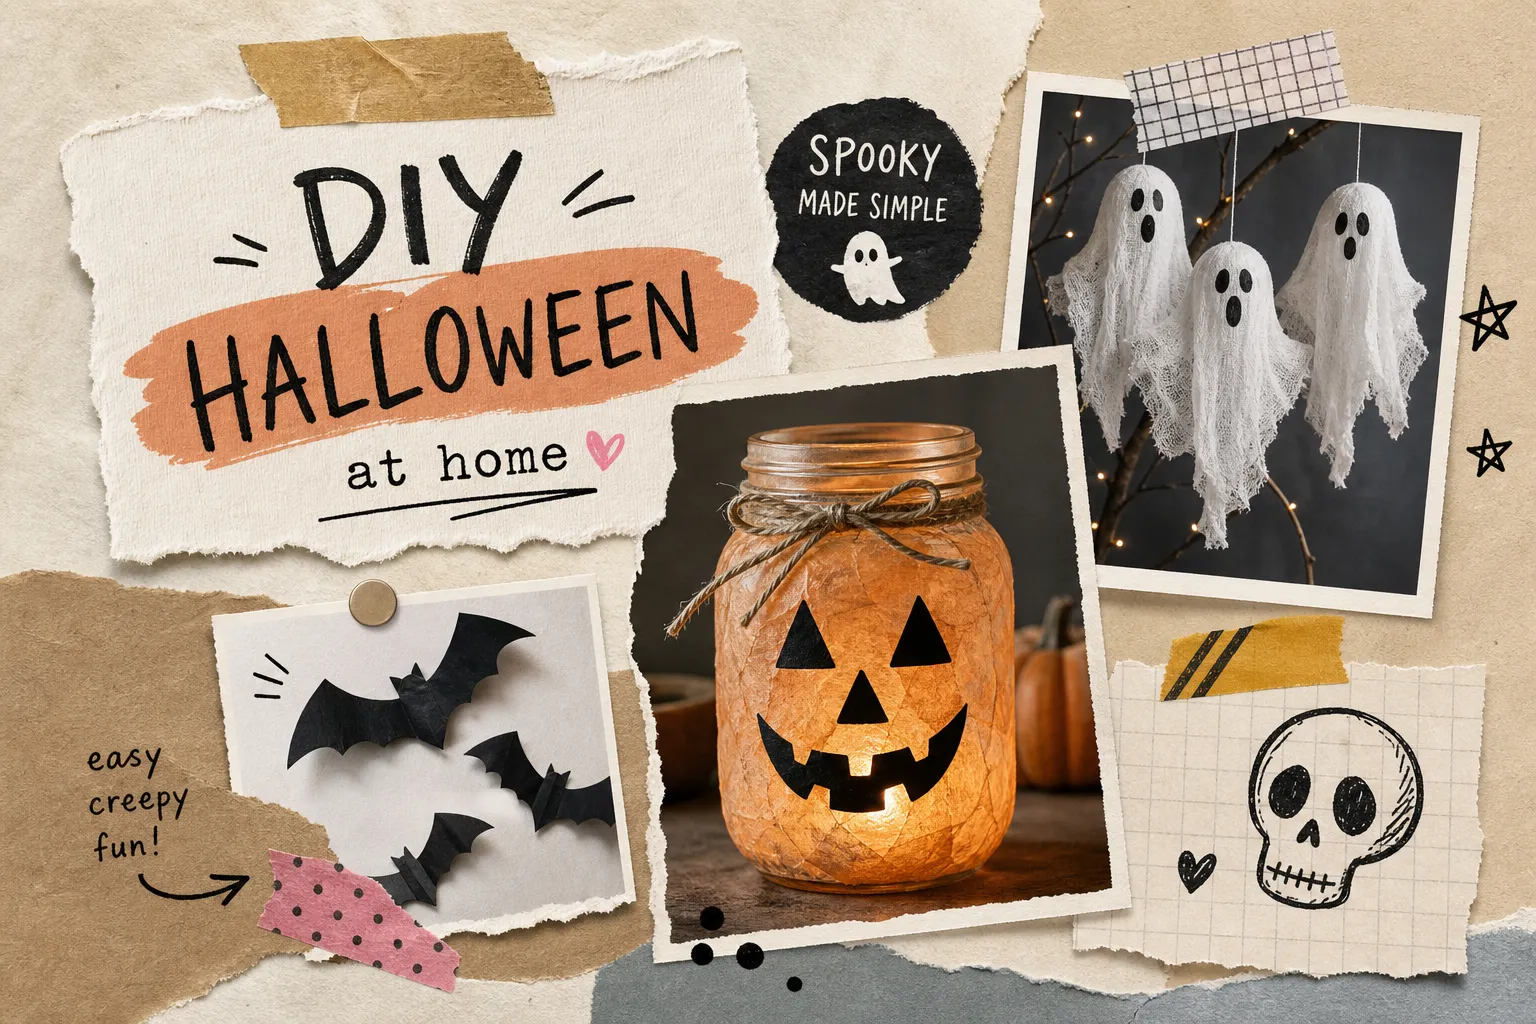
Pick projects that match your time, cost, and skill, then stage them with a calm, haunted ambience. With a 15, 30 minute accent plus one 60, 90 minute hero build as shown below, you can complete a cohesive vignette in a single evening.
How to make Halloween decorations: your setup for 2026
The fastest wins start with a small kit and a plan matched to your night. The 2026 look leans neutral and metallic with paper silhouettes and upcycled glass, this section shows how to make Halloween decorations using thrifted items and common tools. For readers browsing Halloween craft ideas and easy Halloween crafts, you’ll find everything you need to stock once, then remix across your porch, mantel, and party table all season.
Safety quick notes
- Use LEDs only around paper, fabric, or liquids; keep real flames supervised and away from traffic.
- Spray paint outdoors or in a well-ventilated area with a mask; keep kids away from spray steps and blades.
- Test adhesives, paints, and removers on a hidden spot first to check adhesion, finish, and clean lift.
- Cut away from your bodywith shallow passes; consider cut-resistant gloves for foam carving.
Stock your haunt: essential tools and cheap substitutes
Build a core kit you will use for every project: scissors, a sharp craft knife with spare blades, a metal ruler, a hot glue gun, painter’s tape, a cutting mat, acrylic paints with a small brush set, LED tea lights, twine, and black cardstock. Keep a small stash of removable hooks and adhesive putty for renter-safe installs, plus a few battery pack timers for lights. Many of these are the backbone of easy Halloween crafts you can finish in an hour or less.
Substitute where it saves: cereal boxes stand in for cardstock, jars and bottles become apothecary vials, sheet remnants become ghosts, and PVC offcuts form light frames. Thrift frames, vases, and trays are your best value props once you add matte paint. Spend where it counts, quality LEDs with timers, a dependable knife, and plastic- or multi-surface paint, and save on glass vessels, paper, and filler like moss, sand, and gauze. Directional LEDs that mimic flame and crisp, clean cuts (on bats, labels, and stencils) are small upgrades that make budget decor read custom.
Budget map and time grid: pick projects that fit your night
Each DIY below lists Time, Cost, and Skill so you can choose fast. “Low” cost means dollar-store or thriftable items; “Medium” assumes a can of paint or a multipack of LEDs. Use 15 to 30 minute snacks when you want quick impact, then layer one 60 to 90 minute hero build if you have more time. Kid-friendly flags mark projects you can share; always keep blades and spray painting to adults.
Download once, customize forever: printable stencils and templates
Use printable packs for bats, jack‑o’‑faces, witch motifs, spider webs, and gothic frames. Print them as‑is for letter paper, or tile them for windows, cloches, and foam pumpkins. You can use our resource library or any reputable free template sources (for example, family craft blogs that offer printable silhouettes) to get started.
To scale, set your printer to 100 percent for standard size, 50 to 75 percent for minis, or “poster” to tile across pages. Tape, trim, and align registration marks for larger transfers. Transfer methods by surface: on paper, trace directly; on foam or wood, tape the stencil and trace with a blunt pencil to indent; on glass, tape the printout inside the vessel and trace from the outside; on fabric, make a freezer‑paper stencil or use chalk transfer. Test one small corner first for clean adhesion and lift.
Palette and texture cues for a 2026 look
- Colors: cream, charcoal, soft brown, copper, and pewter, grounded by matte black.
- Textures: mix glass, gauze, paper, and brushed metallics for quiet, modern ambience.
- Paint picks:plastic-bonding metallic spraysfor faux pumpkins, acrylics for real ones.
Eerie centerpieces you can build tonight
Tabletop scenes set the mood in minutes. If you’re searching for how to make Halloween decorations with jars, flowers, and thrifted glass, these homemade Halloween decor builds rely on recyclables, secondhand finds, and paint for maximum drama with minimum spend. Follow the steps and place one on your mantel, entry console, or party table.
Apothecary jar trio from recyclables
Materials: clean bottles or mason jars, printable labels, food coloring, water, twine, and LED tea lights or fairy lights. Add “specimens” like twigs, dried herbs, or toy bugs for texture.
- Fill jars with water and tint with a drop or two of food coloring: green, brown, or inky black look authentic. Slip an LED inside or coil fairy lights behind them for backglow.
- Wrap twine around the necks, then tape or glue on printed labels from an apothecary sheet.
- Float a twig, nestle a toy centipede, or add peppercorn “eyes” for specimens; seal caps finger‑tight or leave open for a more aged vibe.
- Cluster three heights on a tray, then scatter bottle caps or moss to break symmetry.
Time: 20 to 30 minutes; Cost: low; Skill: easy; Kid‑friendly: yes. Use only LEDs near liquid and keep real flames out of jars for safety.
Bone-and-bloom bouquet in a matte black vase
Materials: thrifted vase, artificial flowers, plastic bones or skeleton hands, black or copper spray paint, floral wire, and a strip of gauze. Optional floral foam for stability.
- Clean the vase and bones, then spray them matte black or black with a copper light mist for patina. Let dry fully.
- Build the bouquet with tallest stems in back and fuller blooms forward. Wire a few bones into the arrangement so they peek through the petals.
- Wrap the vase neck with gauze and twist a thin wire to secure. Add a single metallic stem to echo the copper mist.
Time: 30 to 40 minutes; Cost: low to medium; Skill: easy; Kid‑friendly: no for spray step. One metallic accent keeps the look modern, not cluttered.
Haunted terrarium cloche
Materials: a glass cloche or upside‑down jar, sheet moss, mini gravestones, tiny skulls, and a micro LED for inner glow. Use a jar lid as your base if inverting a jar.
- Layer moss on the base, creating small mounds so minis sit at varied heights.
- Stage gravestones and skulls; tuck the LED behind a stone or beneath moss for diffusion.
- Lower the cloche slowly to avoid shifting the scene. If using a jar, build on the lid and screw the jar on last.
Time: 25 minutes; Cost: low; Skill: easy; Kid‑friendly: yes. This piece anchors mantels and entry consoles without blocking sightlines.
Bleeding taper candles centerpiece
Materials: white tapers, one red candle for drips, candle holders, a tray, and salt or black sand to catch wax. Consider flameless tapers for kid‑safe tables.
- Light the red candle and carefully drip wax along the top of each white taper to create “blood.” Rotate for natural flow, then blow out the red candle.
- Anchor tapers in holders and set them on a tray filled with salt or black sand.
- Cluster three to five holders at varied heights; add a sprig of dried herbs for a ritual feel.
Time: 15 to 20 minutes; Cost: low; Skill: easy; Kid‑friendly: no flame. Never leave real candles unattended; choose LEDs when crowds or pets are near.
Creepy wall hangings with big visual payoff
Walls tell the story of your haunt. Go minimal with silhouettes, add motion with a bat swarm, or rope a corner with a giant web. These spooky decorations DIY projects are renter‑safe and fast to remove after the party.
How to make Halloween decorations for walls: paper bat swarm
Materials: black cardstock or cereal‑box board, scissors, removable putty or blue painter’s tape, and printable bat templates. Cut a few different sizes for natural motion.
- Fold paper once, align a bat template along the fold, and cut the shape so wings stay connected. Crease each wing upward at the body for a 3D lift.
- Plan a gradient flight from small bats to larger ones that sweeps across a wall, mirror, or staircase.
- Mount with small loops of painter’s tape or dabs of removable putty. Press firmly on smooth, clean paint and test removal on a hidden spot first.
Time: 20 to 30 minutes; Cost: very low; Skill: easy; Kid‑friendly: yes. Avoid pre‑attached stickers that can leave residue; painter’s tape is the safer hold.
Yarn or rope spider web anchor
Materials: yarn or thin rope, removable hooks for indoor corners, or screw eyes for outdoor use, and scissors. Add a lightweight spider for scale.
- Place removable hooks where the web will end and run spokes from center to each hook.
- Weave a spiral from the center outward, looping around each spoke and tightening gently as you go.
- Secure every junction with a simple knot or a small dab of hot glue on non‑painted surfaces.
Time: 25 to 40 minutes; Cost: low; Skill: easy; Kid‑friendly: yes for yarn; adults handle hardware. Outdoors, use rope and screw eyes set into wood for strength.
Minimalist silhouette frames
Materials: thrifted frames, black paper, printable silhouettes, cream backing paper, and spray adhesive or glue stick. Witch profiles, ravens, and gothic frames work well in grids.
- Print silhouettes to fit your frames, then cut them cleanly with scissors or a craft knife.
- Mount silhouettes on cream paper with spray adhesive for a flat, professional look.
- Frame and hang three to six in a tidy grid with even spacing for gallery impact.
Time: 30 to 45 minutes; Cost: low; Skill: easy; Kid‑friendly: yes with scissor cuts. Swap motifs by season and keep frames on the wall year‑round.
Floating hats and sheet-ghost garlands
Materials: witch hats or white cloth, fishing line, pushpins or removable ceiling hooks, balloons, and optional mini LEDs. The effect is dramatic with minimal materials.
- Inflate balloons and slip them under hats or drape with cloth for ghost heads.
- Thread fishing line through a hat or cloth, then suspend from hooks so pieces hover at staggered heights.
- Add a small LED inside each for a halo. Keep clear of heat sources and ceiling fans.
Time: 20 to 30 minutes; Cost: low; Skill: easy; Kid‑friendly: yes. Ceiling installs feel magical and leave floors clear for guests.
Glowing pumpkin luminaries for safe, moody light
Skip open flames for calm, controlled ambience. Here’s how to make Halloween decorations that glow safely: mix real pumpkins with painted finishes, foam stand‑ins you can reuse, and upcycled vessels for layered light. Personalize faces with printable sets for fast variety.
Painted neutral or metallic pumpkins with stencil pattern
Materials: real or faux pumpkins, acrylic paint or a plastic‑bonding spray, painter’s tape, and a stencil pack. Think khaki, ivory, charcoal, and copper for a 2026 palette.
- Clean and dry pumpkins. Prime slick plastic with a plastic‑bonding base if needed.
- Paint in thin coats to a matte neutral or a brushed metallic finish. Let each coat cure.
- Tape down your stencil, then stipple paint through for crisp edges. Lift while damp, fix any bleeds with a liner brush, and let cure fully.
- Seal with light coats of a water‑based clear acrylic or polycrylic. Outdoors, finish with a UV‑resistant clear spray.
Time: 40 to 60 minutes plus dry time; Cost: low to medium; Skill: easy; Kid‑friendly: yes for brush painting. Water‑based clear coats, like polycrylic or clear acrylic, are safer for foam than solvent‑heavy sprays.
Mason jar pumpkin lanterns
Materials: glass jars, orange tissue or acrylic paint, Mod Podge, black paper cutouts, LED tea lights, and twine for hanging. This is a simple, forgiving kid craft and a common method seen across many family‑craft tutorials.
- Clean jars. Wrap the outside with orange tissue using Mod Podge, or brush on translucent orange paint for a stained‑glass look.
- Add black face cutouts from a stencil set. Smooth edges with more Mod Podge and let dry.
- Drop in an LED tea light and tie twine around the rim if hanging. Group several for a soft glow.
Time: 30 to 45 minutes plus dry time; Cost: low; Skill: easy; Kid‑friendly: yes. Choose timer tea lights for set‑it‑and‑forget‑it glow.
Milk jug or paper bag jack‑o’‑luminaries
Materials: clean gallon jugs or lunch bags, markers or black cutouts, sand or pebbles for weight, and LED tea lights. Perfect for walkways and steps.
- Draw faces directly or tape on cutouts. For jugs, cut a flap in the back for light access.
- Pour in a cup of sand or pebbles to keep pieces grounded in wind.
- Place LEDs inside and line your path at regular intervals for rhythm.
Time: 15 to 25 minutes; Cost: very low; Skill: easy; Kid‑friendly: yes. Keep bags dry under cover for longest life.
Foam pumpkins with clean‑cut designs
Materials: carveable foam pumpkins, a sharp craft or utility knife, stencil, battery puck lights, and a water‑based clear coat. Optional cut‑resistant gloves and a dust mask for safety.
- Trace your stencil, then score the lines lightly. Make multiple shallow passes, cutting away from your body with small, controlled strokes.
- Test‑fit the puck light and adjust openings as needed. Smooth rough edges with fine sandpaper.
- Seal cut edges with a light coat of water‑based clear acrylic or polycrylic, then add a UV‑protectant clear if the pumpkin will live outdoors.
Time: 45 to 75 minutes; Cost: medium; Skill: moderate; Kid‑friendly: no cutting. Avoid solvent‑based sprays that can melt foam; water‑based clears are the safer choice.
Outdoor durability, safety, and storage
Wind and drizzle will test any spooky decorations DIY. If you’re mapping how to make Halloween decorations for the porch, choose weather‑smart materials, seal correctly, and power safely. End the season with storage that prevents fade and crush so your build survives to haunt again.
Weather-smart materials and what to skip
- Best picks to reuse: reclaimed wood, PVC, metal wire or rods, outdoor‑rated fabric, and UV‑safe plastics.
- Short‑term picks under cover: cheesecloth, paper, and unsealed foam. Use on porches, not lawns.
Rule of thumb: wood, fabric, metal, and UV‑safe plastic are investments; paper and thin plastics are for one‑season scenes or indoor installs.
Sealants, adhesives, and tie-downs
Seal acrylic finishes with water‑based clear coats; add a UV‑resistant clear for sun‑exposed props. Foam needs water‑based products to avoid melting, so test a hidden spot first.
On glass, silicone‑based adhesives hold and flex with weather; on fabric, hot glue or contact cement works well. For renter removals, use painter’s tape, removable putty, and adhesive hooks, then lift with a slow peel. If residue remains, a citrus‑based remover can help, spot test in a hidden area to protect paint and finishes.
Tie down porch and yard props with clear fishing line to rails, zip ties to posts, tent stakes for ground pieces, and sand or bricks hidden in containers. Weight luminaries and pumpkins so they do not become wind projectiles.
Lighting safety and timers
Use LEDs only. For effortless routines, choose battery packs or tea lights with built‑in timers that cycle 6‑on, 18‑off each day. Brands such as Homemory or budget multipacks are widely available; compare runtime, brightness, and price to fit your setup.
For cords, route along edges, tape them down where feet pass, and use outdoor‑rated extension cords with GFCI outlets. Keep power connections off wet ground and cover with a weather hood if rain is forecast.
Off-season storage that prevents crumble and fade
Use the bag‑and‑bin method: place decor in breathable bags with moisture control (desiccants such as silica gel, as appropriate), then sort into labeled bins by zone such as porch, mantel, and yard. This reduces rummaging stress next year.
Protect silhouettes, hats, and gauze by storing them flat or rolled with tissue. Keep foam pumpkins cool and dark to prevent UV yellowing; avoid hot attics if you can.
Style the scene: layout recipes and finishing touches
Bring it together with simple placement formulas. These passes create cohesion and make each DIY feel like part of a haunted whole.
Porch vignette recipe
Use a triangle composition: tall at back with floating hats or a sheet ghost, mid‑height with painted pumpkins, and low along the ground with bag or jar luminaries. Swap in a welcome mat that matches your palette and add a single metallic accent like a copper pumpkin for focus.
Mantel and wall cluster recipe
Set the haunted cloche at center, flank with silhouette frames, then let a bat flight rise diagonally to the corner. Group decor in odd numbers and keep some negative space for air; the eye needs a place to rest.
Party table recipe
Anchor with the bone‑and‑bloom bouquet, then stage the apothecary trio and bleeding tapers on a black runner layered with gauze. Tuck LEDs behind jars for backlight and keep food zones clear of open flame.
Fast renter-friendly swaps
Lean on removable hooks, putty, and battery LEDs for fast installs with clean removal. When the theme shifts, reprint new silhouettes from your template set or our resource library and slide them into the same frames for instant transformation.
You now know how to make Halloween decorations that look elevated, hold up to a crowd, and glow safely all night. Start with one centerpiece, add a wall swarm, then layer in pumpkin luminaries, and you have a complete haunt in an evening.
FAQ: how to make Halloween decorations
How to make Halloween decorations quickly? Pair one 15, 30 minute “snack” project (paper bats, milk‑jug luminaries) with one 60, 90 minute hero (painted pumpkins or a bouquet). Lay out tools first so you can move from step to step without hunting.
What are the easiest outdoor‑safe materials? PVC, sealed wood, UV‑safe plastics, and outdoor‑rated fabrics hold up well. Paper, cheesecloth, and unsealed foam work best under cover or indoors.
What’s the safest lighting for kids and pets? LED tea lights, flameless tapers, and battery packs with 6‑on/18‑off timers. Keep cords taped down, use GFCI outlets outdoors, and avoid placing lights where they’ll be kicked or chewed.
How do I hang decor without damaging walls? Use painter’s tape, removable putty, or adhesive hooks matched to the item’s weight. Always test on a hidden area and peel slowly at removal.
What sealant should I use on foam pumpkins? Choose water‑based clear coats (polycrylic or clear acrylic). Solvent‑based sprays can melt foam.
How can I store decorations to prevent damage? Store flat or gently rolled with tissue, sort by zone in labeled bins, and add moisture control (desiccants) as needed. Keep foam pumpkins out of heat and sun to reduce yellowing.
Leave a Reply